Creating Home Screen Widgets with Expo's Native Generation (CNG).
Introduction
Based on analysis of the top 10k apps in the iOS App Store, I found that 80.2% had at least one extension. Out of the 80% that have an extension, the top three most common extensions were:
- Notification Service: 34.8%
- Widgets: 25.5% (Home Screen & Today)
- Siri Intents: 11%
So how do we build these features with Expo? Luckily, the team at SweetGreen contributed a Config Plugin to OneSignal for configuring a Notification Service; onesignal-expo-plugin.
Moving down the line, the next most common extension is the Home Screen Widget. 20.5% of the top 10k apps have a Home Screen Widget. If one in five apps have a Home Screen Widget, then it should probably be pretty obvious how to add one.
About Widgets
Apple introduced the Today widgets with iOS 8 (2014), they later released Home Screen widgets in iOS 14 (2020), then came Lock Screen widgets for iOS 16 (2022), and by the end of 2023 we will finally have interactive widgets. Clearly there's a lot of movement in this space and it's showing no signs of slowing down.
So how do we use these with Expo? Well first we have to understand what "with Expo" means.
Continuous Native Generation
Expo apps are usually developed in one of two ways:
- Standard: you have an
iosandandroiddirectory that you are responsible for building, maintaining, and upgrading. This is the default workflow of Expo, it's the easiest to understand, but it does have some drawbacks. The main one being that it's hard to upgrade and maintain your project as it scales. - Continuous Native Generation (CNG): the
iosandandroiddirectories are continuously generated based on project configuration. This system is unique to Expo and makes it easy to upgrade, and reduces the overhead of your project as it scales.
Building anything with the standard workflow is pretty straightforward, just look up "how to do X topic for Y platform" and follow whatever guide comes up.
This post, however, will cover how I built and shipped an Apple Home Screen widget for my app Pillar Valley all while using CNG!
The Goal
It's best to design these things with a goal in mind. I wanted to display some syncronized data from my app, in this case, the total number of points that have ever been scored. To iterate a little further, I also wanted to support light and dark modes. Based on a quick look around the top apps, these appear to be the most common features of widgets.
Generating Apple targets
iOS apps have a default target, the app, but you can add additional targets which are distributed around the main one.
The main difficulty with this project is that I didn't want to pull in React Native to display some basic elements in the widget, so I'd need to use SwiftUI directly. The problem here is that SwiftUI can realistically only be developed in Xcode (Xcode is not the best editor for automation).
To support this workflow, I designed an Expo Config Plugin which could generate a native target outside the generated ios directory, that was linked to the generated pbxproj file. This would enable me to open and develop the widget in Xcode, while saving any changes for this particular target outside of the generated ios directory.
This is possible due to the maddness that is Apple's pbxproj file format. Files in pbxproj are represented twice, once as the build/asset file (like a JavaScript bundler), and a second time as the visual reference in Xcode (which directories the file lives in). This behavior is generally a major nightmare as a file would appear one way in Xcode, and a totally different way in the file system, however in this case, it's an opportunity!
Of course, theory will only get us so far :] how do we actually do this? pbxproj is Apple's proprietary file format that they use for Xcode projects and never bothered to document. Luckily, I've spent a lot of time reverse engineering it and have a pretty good understanding of how it works. All of my findings are public in the @bacons/xcode package.
In order to determine the correct settings, I wrote a script which would diff a project before and after adding a target via Xcode, then I replicated the PBXNativeTarget and PBXProject settings in my Config Plugin. I then assigned the different targets to a preset name like widget.
One other thing that made testing much faster was to create a prebuild template that didn't contain React Native. React Native ships a lot of uncompiled code to the user, and the user is responsible for compiling this unchanging code everytime. Since Expo Prebuild is technically agnostic to React Native, this was no problem.
With everything configured, I could perform a fully clean prebuild/build with:
Terminal
𝝠 npx expo prebuild --template ./prebuild-template-no-rn.tgz -p ios --clean && npx expo run:ios
Learn more: Expo Apple Targets.
File-based targets
After I had target generation down, I built a Config Plugin which would generate a new target based on the existence of files in my project's root targets directory.
If a targets/{name}/expo-target.config.json file existed, then a new target would be generated in the root pbxproj.
This config file would give us a hook to add other important features like frameworks to link, entitlements to codesign, assets to include, etc.
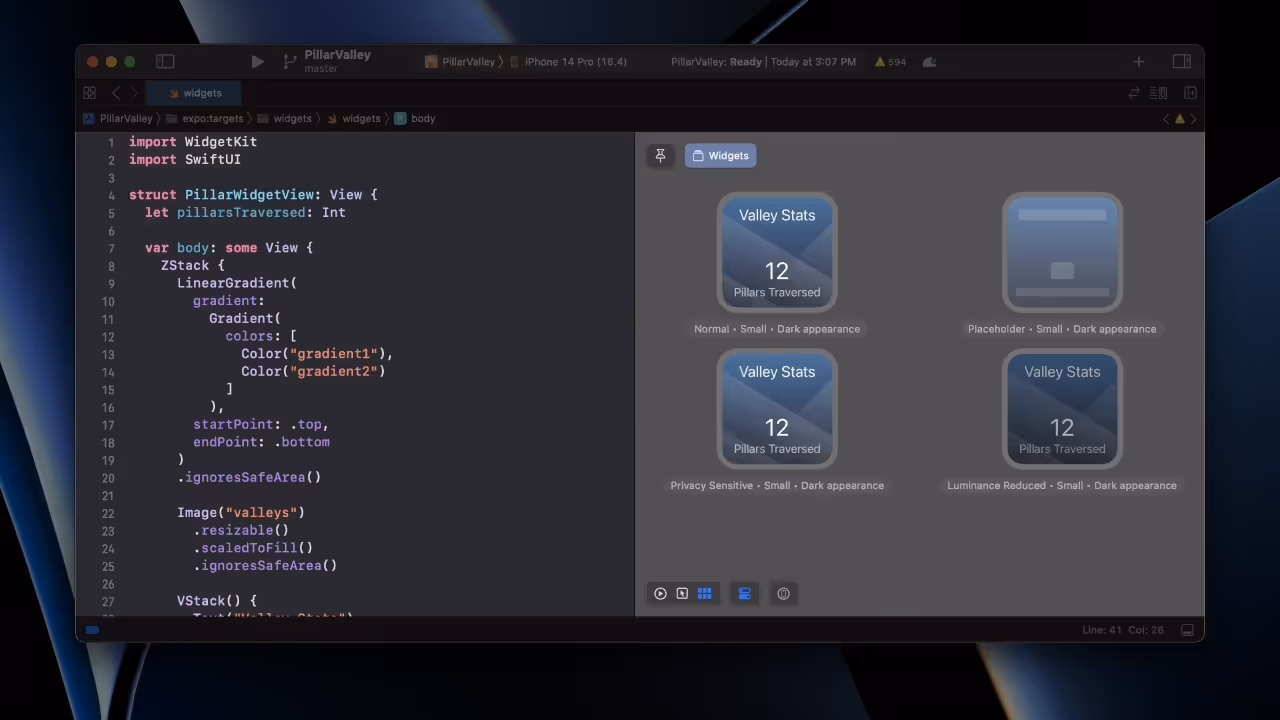
Developing a widget with SwiftUI
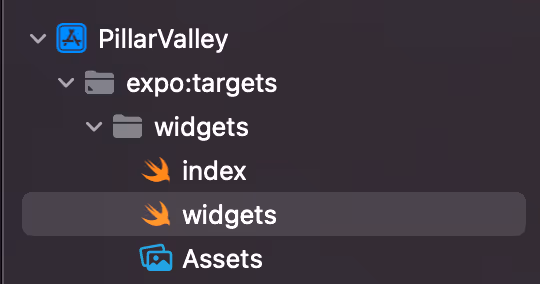
After I run prebuild, I'd get a template project with a new target called widgets. I could open this in Xcode and start developing my standard Apple widget. The template has the following files:
targets/widgets/index.swift
// (Entry file)import WidgetKitimport SwiftUI@mainstruct exportWidgets: WidgetBundle {var body: some Widget {// Export widgets herewidgets()}}
And the widget itself:
targets/widgets/widgets.swift
import WidgetKitimport SwiftUIstruct PillarWidgetView: View {var body: some View {// ...}}struct PillarProvider: TimelineProvider {func placeholder(in context: Context) -> PillarEntry {PillarEntry(date: Date())}func getSnapshot(in context: Context, completion: @escaping (PillarEntry) -> Void) {let entry = PillarEntry(date: Date())completion(entry)}func getTimeline(in context: Context, completion: @escaping (Timeline<PillarEntry>) -> Void) {let entry = PillarEntry(date: Date())let timeline = Timeline(entries: [entry], policy: .atEnd)completion(timeline)}}struct widgets: Widget {let kind: String = "PillarWidget"var body: some WidgetConfiguration {StaticConfiguration(kind: kind, provider: PillarProvider()) { entry inPillarWidgetView()}.configurationDisplayName("Pillar Widget").description("Displays the number of pillars traversed.")}}struct widgets_Previews: PreviewProvider {static var previews: some View {PillarWidgetView()}}
Everything here can be modified as-is in Xcode and the changes will be saved outside the project. There is nothing React Native specific about this, it's just single-platform native development.
Toiling with SwiftUI Preview
Around the time React's Fast Refresh was released (Sep 2019 / React Native 0.61), Apple released a fast preview feature to SwiftUI––SwiftUI Preview (Sep 2019, Xcode 11). You may hear from developer advocates that these two tools are analogous as they serve the same purpose, but this couldn't be further from the truth. While React Refresh works at any scale and stays fast, SwiftUI seemingly corrupts state between runs and needs to be hard reset after a while. It's possible to get SwiftUI previews that show you the wrong update, causing you to modify code incorrectly. I spent a fair amount of time restarting Xcode to get things working again every 5 or so updates.
I ended up designing the widget in Figma, then writing the SwiftUI code in VS Code with comments and GitHub Copilot's code side-by-side. The changes would show up in Xcode and I'd build/validate types there to test it out.
Ultimately I ended up needing to recompile the widget target maybe a dozen times to get the widget looking right. Definitely looking forward to a future where SwiftUI Preview is stable enough to iterate on widgets directly, but glad I had access to both Xcode and VS Code with this workflow.
Sharing data
Widgets are effectively standalone apps that are bundled with your main app. This means that they don't have access to any of your app's sandboxed data. Apple provides a mechanism for sharing data between your app and your widget called App Groups. App Groups are a way to share data between apps that are part of the same App Group. You can read more about App Groups here.
Setting up the App Group
I needed to pick an app group and assign it to my widget and app, App Group strings are prefixed with group. and often just use group.<bundle-identifier>. I decided to use group.bacon.data for my app group because I wasn't thinking straight.
First, I set the app group in my app.json, Prebuild converts this into a native entitlement, and EAS CLI will automatically configure the App Group for you on Apple's servers.
app.json
{"ios": {"entitlements": {"com.apple.security.application-groups": ["group.bacon.data"]}}}
Second, I updated my Apple Targets Config Plugin to support entitlements directly in the expo-target.config.js file. This would allow me to configure the App Group for my widget target (targets/widgets/target.entitlements). This step wasn't required but I prefer using autocomplete+JSON to using entitlements plist.
expo-target.config.js
module.exports = {type: 'widget',entitlements: {'com.apple.security.application-groups': ['group.bacon.data'],},};
EAS CLI is smart enough to use our default Apple target for codesigning, but any additional targets need to be configured manually. We can do this using the experimental extra.eas.build.experimental.ios.appExtensions object in the app.json:
app.json
{"extra": {"eas": {"projectId": "a1a81680-f84c-11e7-88a7-c74e9d068889","build": {"experimental": {"ios": {"appExtensions": [{"bundleIdentifier": "com.evanbacon.pillarvalley.widgets","targetName": "widgets","entitlements": {"com.apple.security.application-groups": ["group.bacon.data"]}}]}}}}}}
I wrote an additional Config Plugin which could do this automatically, so we don't need to worry about it getting out of sync with the target. Throughout this process, I was running npx expo config --type introspect to preview the generated native settings quickly.
I regenerated the native ios project with the new Config Plugins and entitlements, then everything was ready to start sharing!
Terminal
𝝠 npx expo prebuild --clean --platform ios
Writing shared settings
To set data and update the widget, I built a local Expo module which would write a value to NSUserDefaults and then trigger a widget update. The widget would then read the value from NSUserDefaults and display it.
NSUserDefaultsis the native API for using App Groups to share data between apps.
Creating a local Expo module is very easy, I simply ran the following in my project root:
Terminal
𝝠 npx create-expo-module --local
This left me with some boilerplate code that I could modify to suit my needs.
modules/smart-settings/ios/SmartSettingsModule.swift
import ExpoModulesCoreimport WidgetKitpublic class SmartSettingsModule: Module {public func definition() -> ModuleDefinition {// Name of the module as used in JSName("SmartSettings")// Function to call from JSFunction("set") { (key: String, value: Int, group: String?) inlet userDefaults = UserDefaults(// The group name is the same as the App Group namesuiteName: group)userDefaults?.set(value, forKey: key)// Trigger a widget update to sync the dataif #available(iOS 14.0, *) {WidgetCenter.shared.reloadAllTimelines()}}}}
Additionally, I used the new tsconfig paths feature to make importing the module easier:
tsconfig.json
{"compilerOptions": {"paths": {"local:*": ["./modules/*"]}},"extends": "expo/tsconfig.base"}
This enabled me to import the module like so:
import SmartSettings from 'local:smart-settings';
After rebuilding the iOS app with the new module:
Terminal
𝝠 npx expo run:ios
I could call it from my Zustand data store:
src/zustand/models.ts
// In some reducer ...SmartSettings.set('pillarsTraversed', total, 'group.bacon.data');
Reading shared settings
On the App Clip side (SwiftUI), I asked ChatGPT to give me some code to read the value from NSUserDefaults and display it in the widget.
struct PillarProvider: TimelineProvider {// ...func getTimeline(in context: Context, completion: @escaping (Timeline<PillarEntry>) -> Void) {// Notice the App Group is used herelet userDefaults = UserDefaults(suiteName: "group.bacon.data")// And the key for the data that we use in the Zustand store.let pillars = userDefaults?.integer(forKey: "pillarsTraversed") ?? 0// Pass the data to the widgetlet entry = PillarEntry(date: Date(), pillarsTraversed: pillars)// Some other stuff to make the widget update...let timeline = Timeline(entries: [entry], policy: .atEnd)completion(timeline)}}
Dark mode
To support dark mode, Apple recommends you use colorset files to represent dynamic colors in your app.
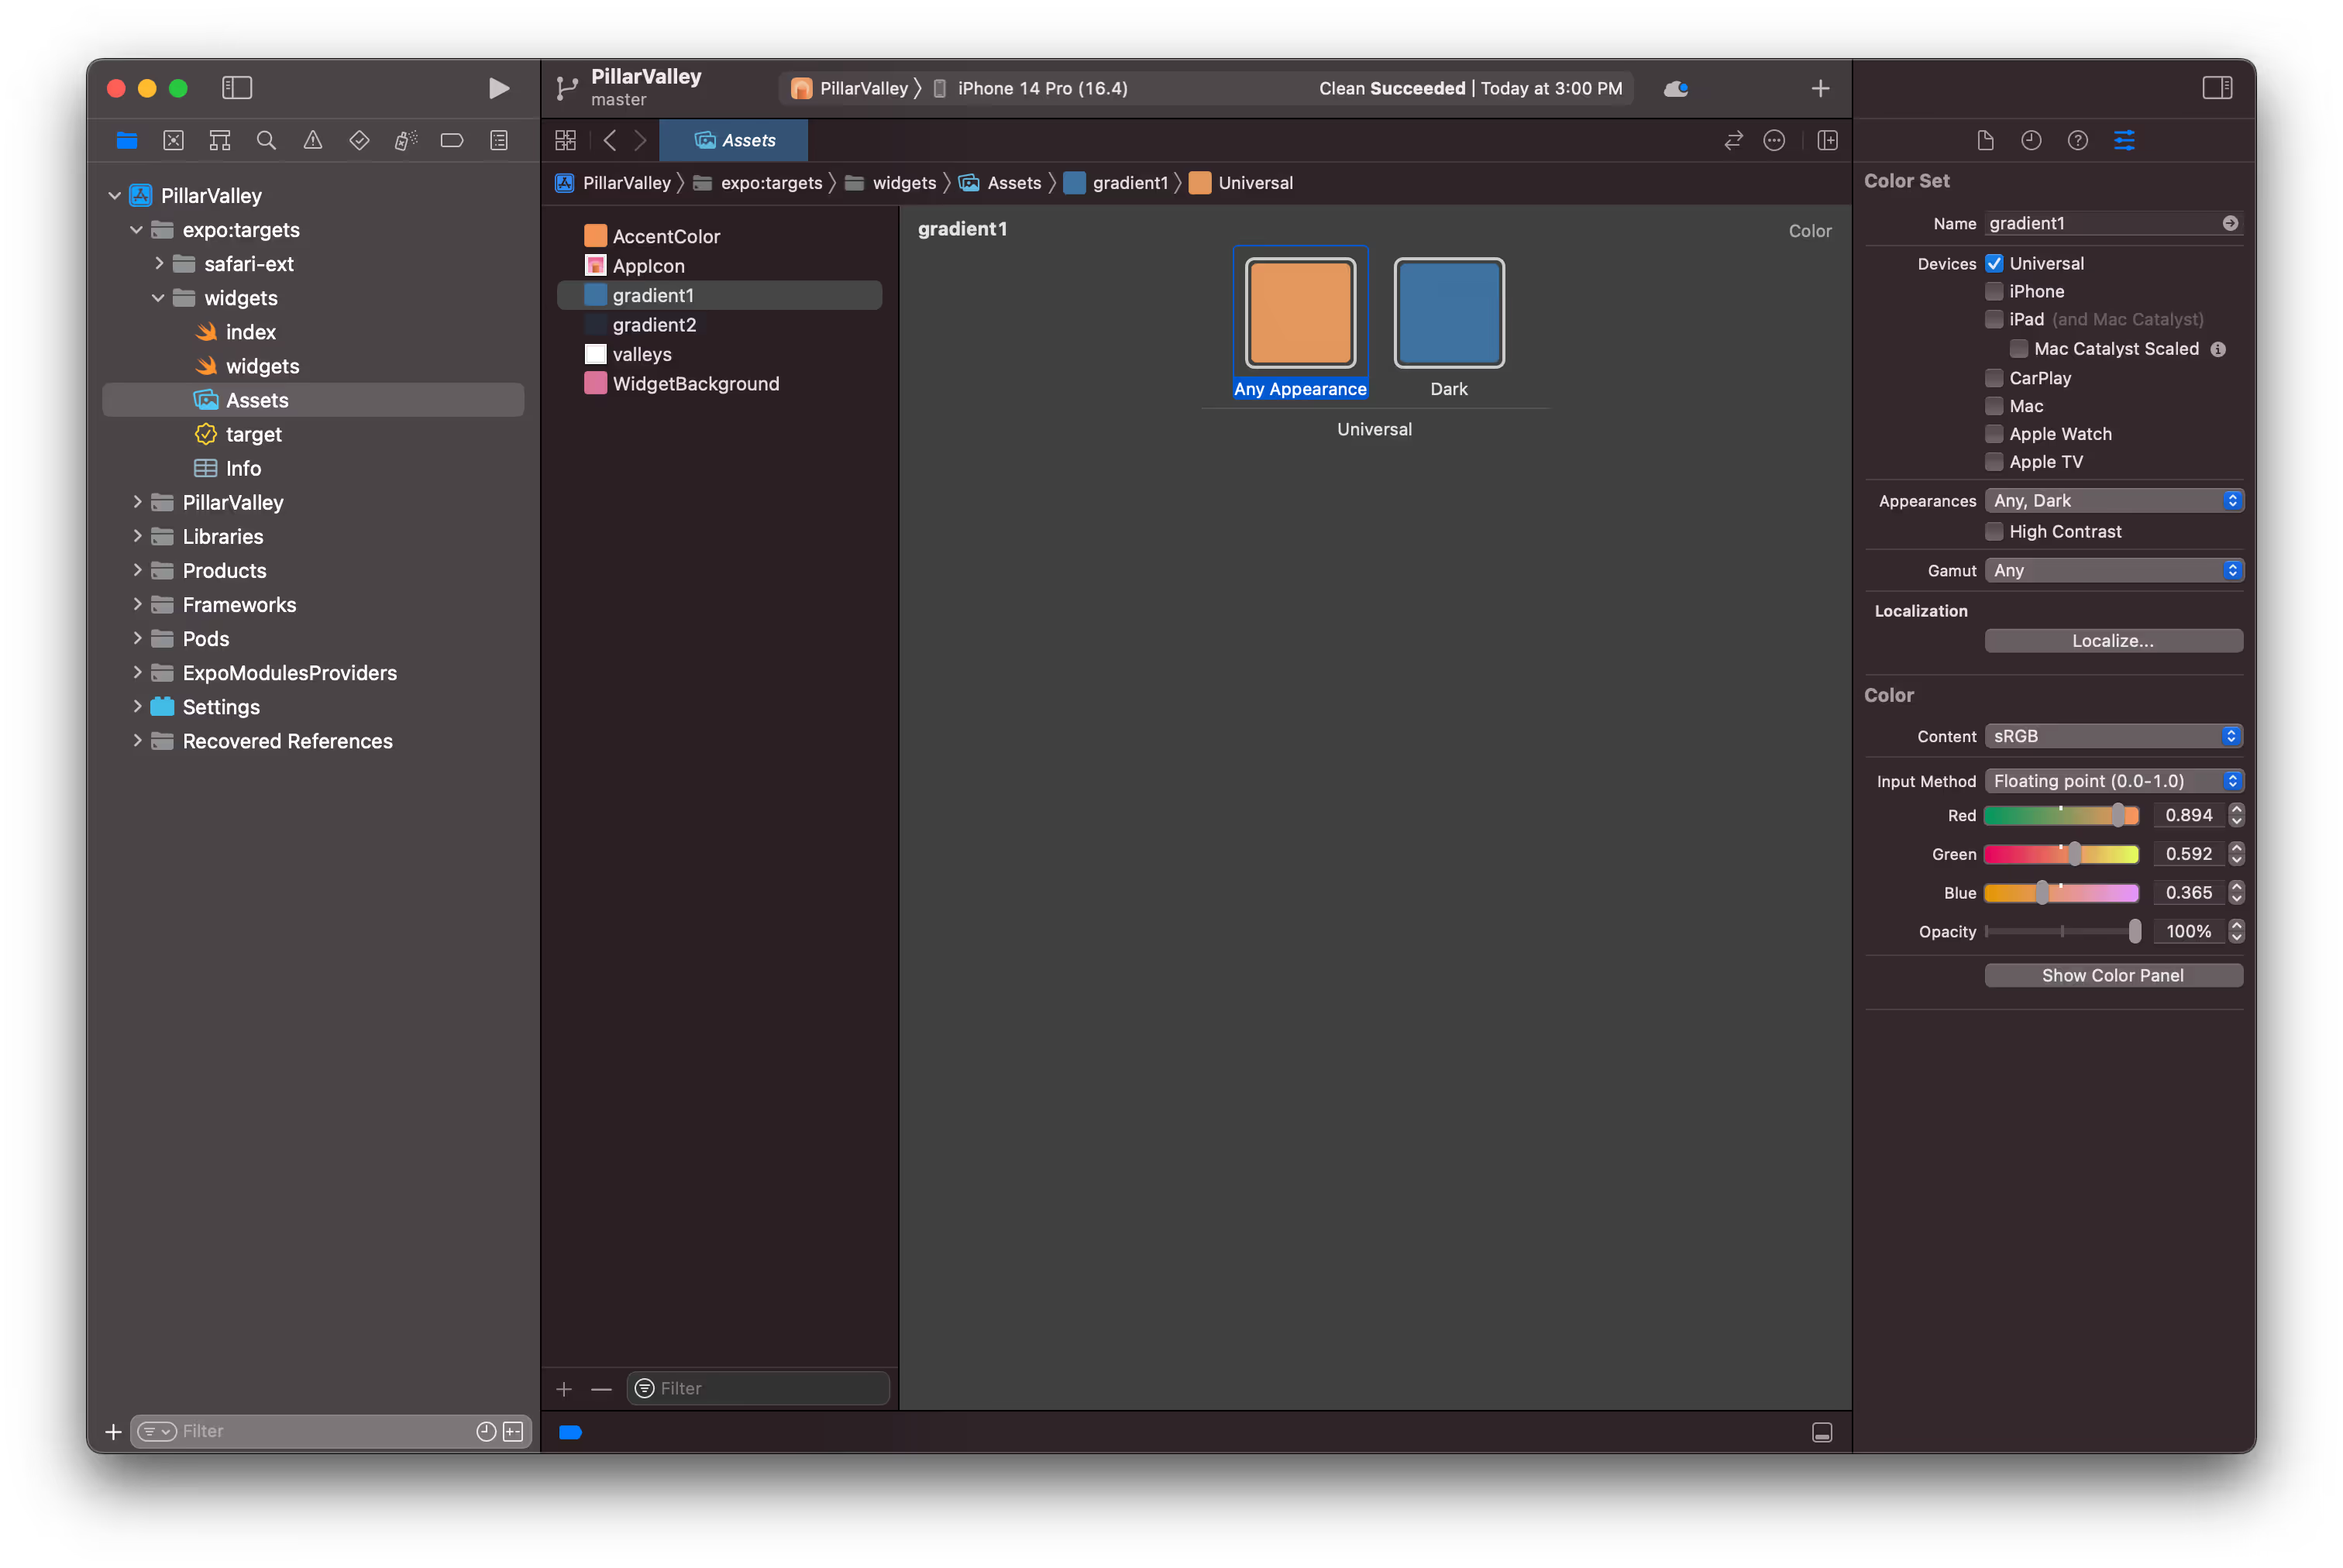
Where a web developer using Tailwind might write: bg-black dark:bg-white, an Apple developer would open Xcode and create a new *.colorset file folder, then step through a UI to pick the exact red, green, and blue values for each color. The on-disk output of this UI looks something like this:
Assets.xcassets/gradient1.colorset/Contents.json
{"colors": [{"color": {"color-space": "srgb","components": {"red": 0.8941176470588236,"green": 0.592156862745098,"blue": 0.36470588235294116,"alpha": 1}},"idiom": "universal"},{"appearances": [{"appearance": "luminosity","value": "dark"}],"color": {"color-space": "srgb","components": {"red": 0.24313725490196078,"green": 0.4470588235294118,"blue": 0.6274509803921569,"alpha": 1}},"idiom": "universal"}],"info": {"version": 1,"author": "expo"}}
As you can imagine, this is a miserable developer experience, so I built CSS color conversion into my Config Plugin.
Now I can just write the following to define a native responsive color:
expo-target.config.js
module.exports = {colors: {gradient1: {light: '#E4975D',dark: '#3E72A0',},},};
Running the prebuild command will now automatically convert the CSS colors to hex, then hex to Apple's expected format:
Terminal
𝝠 npx expo prebuild -p ios --no-install
The resulting color could be used with Color('gradient1') in SwiftUI. This is a huge improvement over the default Apple workflow, I could import and share constants from JS, then use them in my SwiftUI code.
Building and deploying
After I had everything wired up, all I needed to do was build and submit with EAS:
Terminal
𝝠 eas build -p ios --auto-submit
All of the codesigning, provisioning, and submission was handled for me. I just submitted for review and waited for Apple to approve it, the review took about 30 hours.
Pro tip: If your app is not using some non-standard encryption (e.g. not a crypto wallet), then you can set the following in your Expo config and submissions will go right to Test Flight without having to visit the App Store Connect website:
app.json
{"ios": {"infoPlist": {"ITSAppUsesNonExemptEncryption": false}}}
Conclusion
You can download Pillar Valley and try the widget today, or check out the source code.
- I love Continuous Native Generation, the amount of convenience scripting and automation it enables is incredible! I'm very cautious about introducing functionality that will make it harder to upgrade my app, but thanks to Expo Config Plugins, I was able to build a sustainable new feature without sacrificing the simplicity of future upgrades.
@bacons/xcodeis really exciting! There's no shortage of things to improve in Xcode.- EAS Build having simple hooks into configuring codesigning is fantastic, I love that the same JavaScript function that can whitelabel and generate my native code, can also ensure the E2E build process works. Without this, the last half of the article would've been much longer than a single command.
- Local Expo Modules are a miracle, being able to just drop-in a single Swift function for my specific purpose is a dream come true.
All together, the various different aspects of Expo CLI and EAS CLI came together to make this project a breeze while still remaining highly powerful!